Easy to Draw Books Stacked
How To Draw A Book: 7 Easy Step By Step Tutorials

Hello Planning Mashers!
Today I'll share with you 7 step-by-step doodle tutorials for beginners on how to draw a book (or several books).
And don't even worry if you never doodled before – I got you covered.

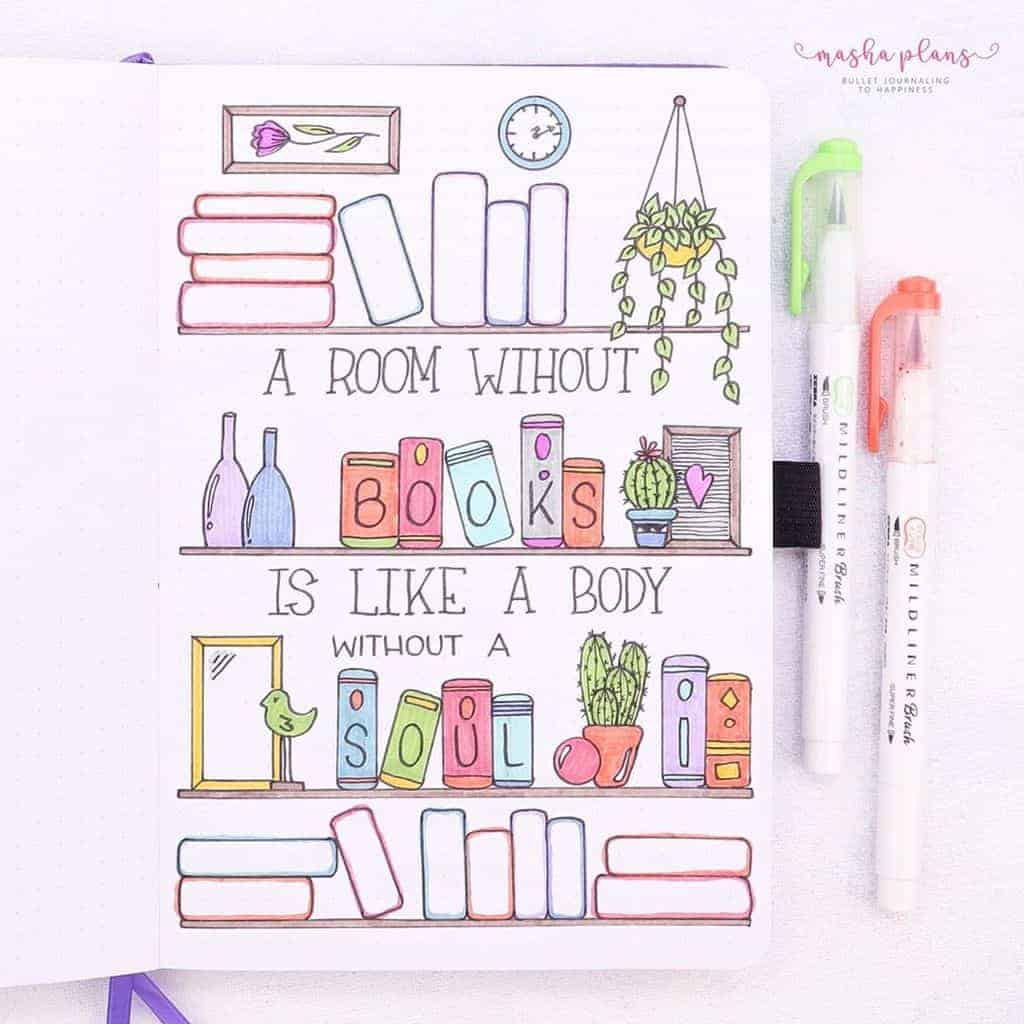
Since my September Bullet Journal setup is books themed, I realized that I'll be doodling a lot of books and tried to come up with different ways to do it.
Once I did I thought – heck, I might as well share these with you guys!
Doodling books is very easy and it can definitely be useful in your Bullet Journal, starting from a book tracker all the way up to a full-on Bullet Journal theme.
They're also great doodles to add to your Bullet Journal pages for school or your visual notes.
So altogether, a very useful type of doodles if you ask me!
Let's dive in and see how you can be very different and creative with these super easy-to-doodle books.
This post may contain affiliate links. They will be of no extra expense for you, but I receive a small commission. Please see my Disclosure for more details. Thank you for supporting Masha Plans!
I Can't Doodle
Before you start self-doubting let me assure you – you absolutely can doodle!
Doodling is just a skill to learn, all you need is some more practice. Plus these tutorials are really beginner-friendly and you can't go wrong with these, even if it's your first time doodling.
Before we get into the tutorials, I just want you to leave here a few links to some of my posts on how to learn to doodle, so if you feel like you want to work on this more – you have a helping hand.
Learn To Doodle: Beginner's Guide To Bullet Journal Doodles
Free Resources To Learn How To Doodle
9 Simple Drills To Improve Your Creativity
Doodling Supplies
When you sit down to doodle, you really don't need much – a pen and paper will work just fine.
But I still feel like sharing some of my favorite supplies, just in case you'd want to add something new to your stationery collection.
First – paper. You can just take a piece of paper or a pad. My favorite paper pad so far is this Rhodia one.
But! I actually prefer to doodle in a notebook. This will kind of create a reference point with doodle ideas in the future, and it'll also be very cool to flip through the pages and see how much your doodling actually improved.
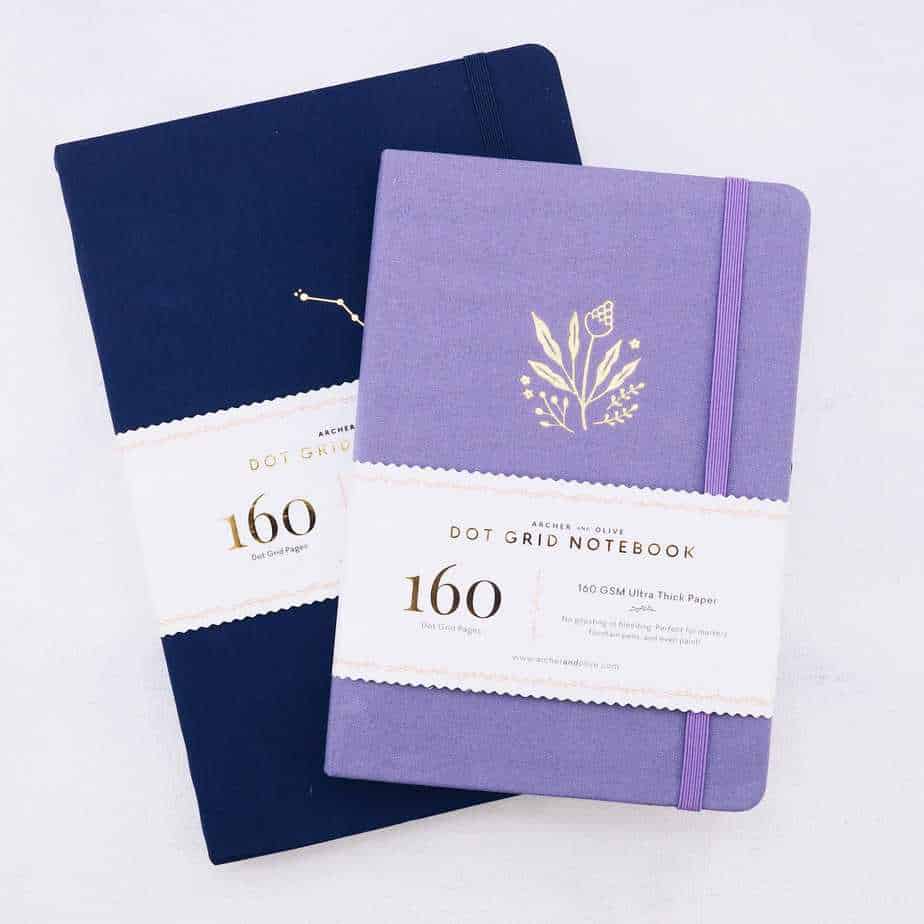
My favorite doodling (and not only) notebook is by Archer and Olive. They have a wonderful pure white paper and it's so thick that if you later decide to use alcohol markers or even watercolor to add an accent to your doodles – it will not damage the paper at all.
(pss, they actually also have notepads you can use for doodling with the same amazing paper!)
You can check my detailed review of Archer and Olive notebook if you want to learn more about why I love them so much. And if you ever decide to buy one – be sure to use code MASHA10 to get 10% off your order.
Next aspect – pens. For doodling, I prefer to use fine liner pens. They have a richer black color and moreover – if you get a set, they'll likely have different tip thickness which allows adding more dimension to the doodles.
My favorite ones are Faber Castell Pitt Artist Pens, but there are also tons of other amazing options, you can see some below. These are a few I used before and liked, plus they are among favorites by tons of Bullet Journal experts (some of my favorite accounts that I've been following and admiring for ages).
Finally, when you sit down to doodle, a pencil and an eraser are very helpful. I always start my doodles with a pencil – it makes them look cleaner later and I can make changes if I don't like something before I use a permanent pen.
Now you have all the supplies ready, let's get doodling!
How To Draw Books
Now, I know I talked a lot about doodling supplies, but actually, for this blog post, I decided to doodle things digitally.
I find that for tutorials, it's cleaner and easier to understand if I make it on the iPad.
However, every time I sit down to doodle for myself – it's all paper for me! If you want to see some of these doodles in action – be sure to check my September Bullet Journal setup.
Ready? Here are some super simple doodle tutorials.
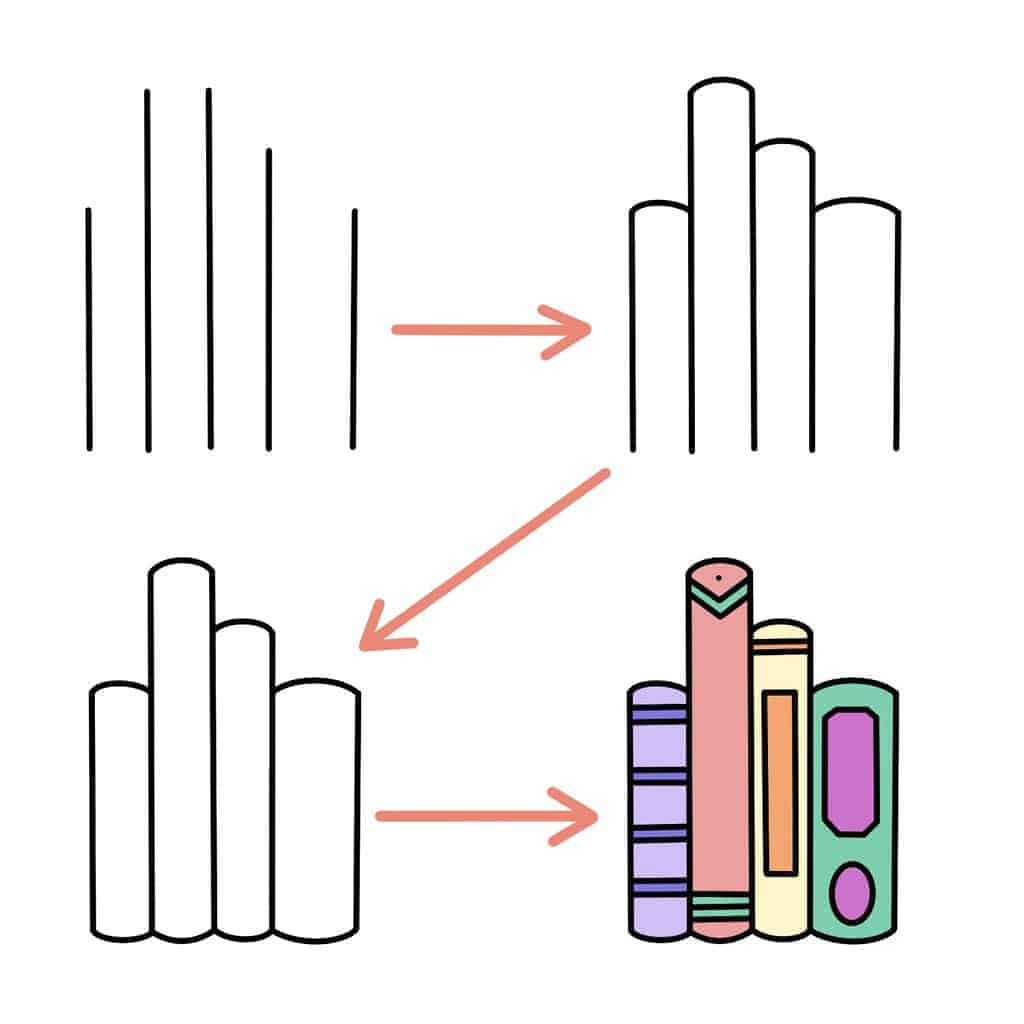
How To Draw Books Standing
This is the easiest way to doodle books and it's probably the most popular one. These will look great in your book tracker!
Start from drawing several vertical lines, they will be your book spines later. Be sure they are of different height and maybe, have a bit of a different distance between each other. This will make each book stand up a bit more.
Next – add curved lines to the top and to the bottom of your lines.
Finally, add some decorative elements to your spines – add dots, lines, circles, rectangles. Let your imagination flow.
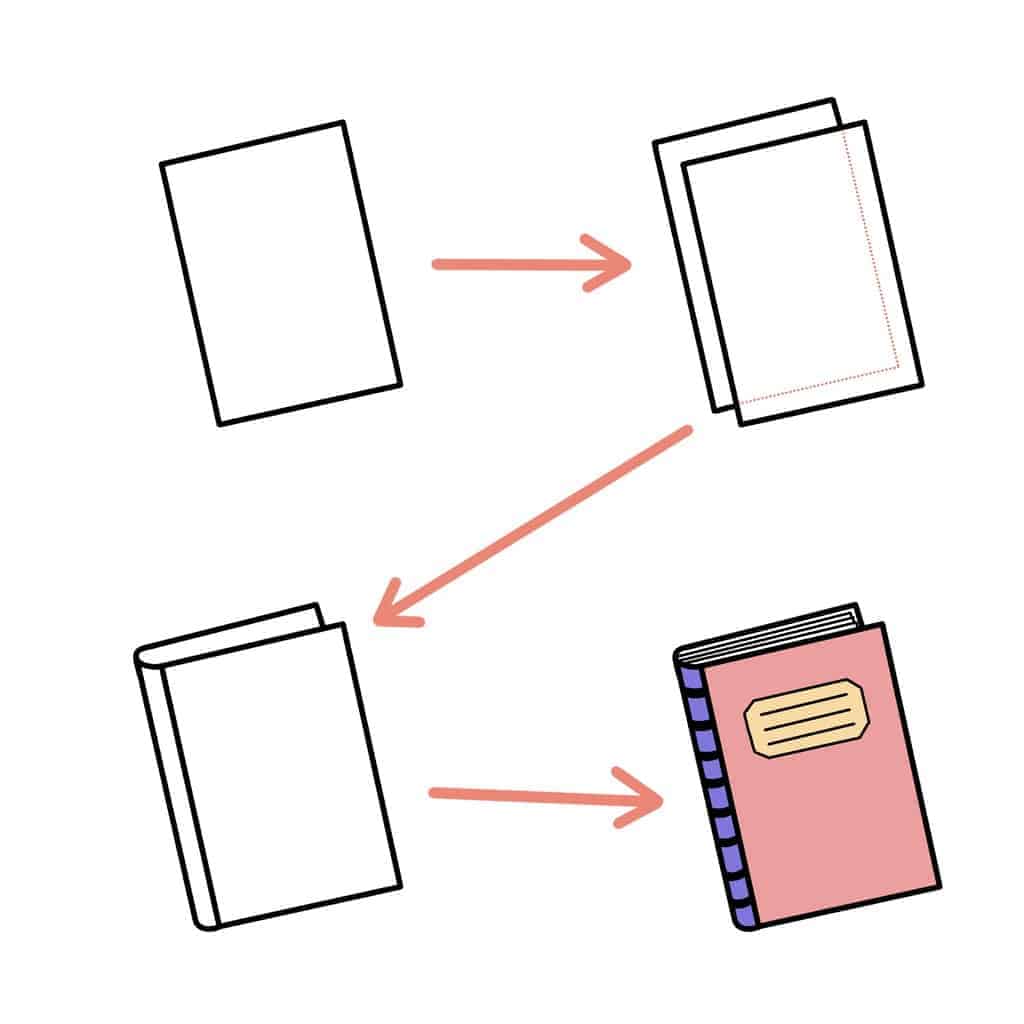
How To Draw A Book
Here is what you do if you need to doodle one single book.
Start with two rectangles, one in front and one at the back, but it's a bit offset. Most of the rectangle at the back won't be seen, so it's a good doodle to start with a pencil.
Connect the lefty sides of both rectangles with little curved lines. This area is your book spine.
Finally, add some details. Decorate your spine and book cover, Add more lines between the rectangles so it looks like pages.
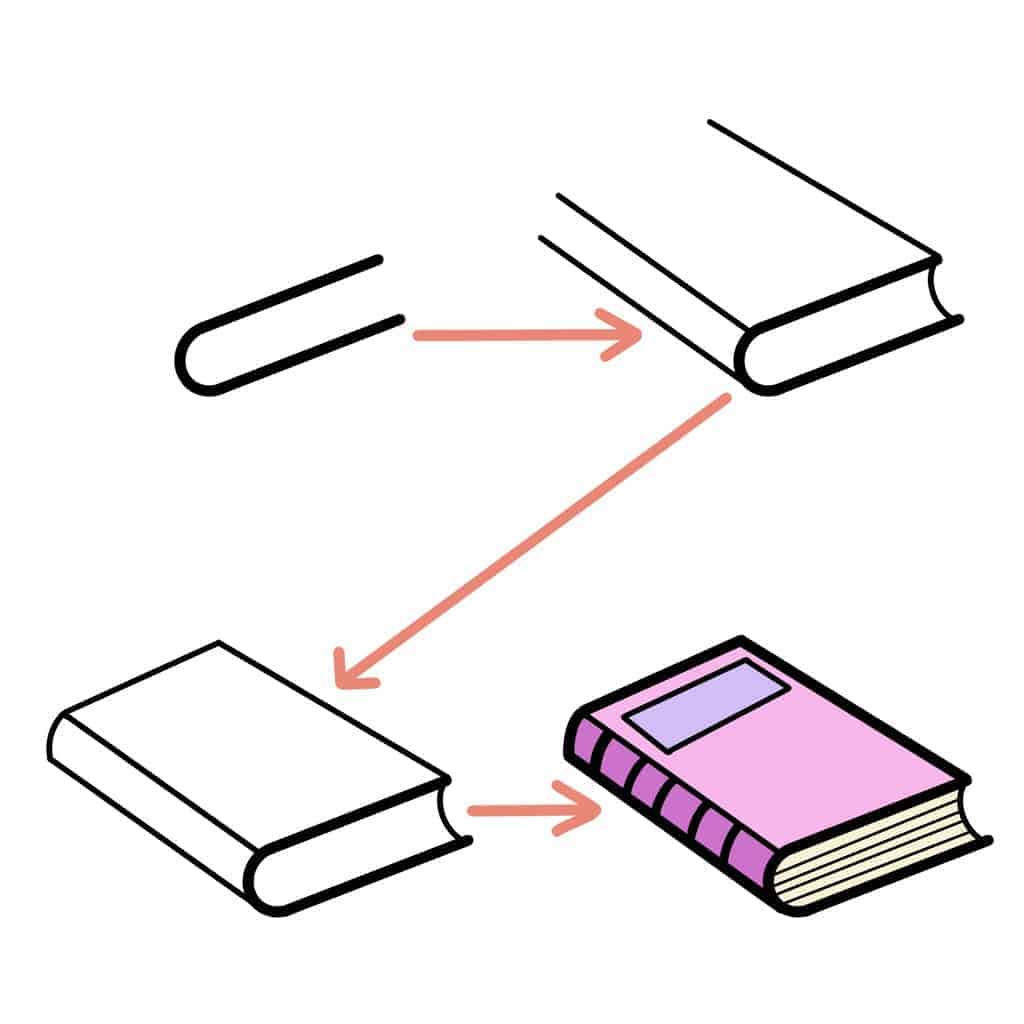
How To Draw A Book (angled)
Another way of drawing a book starts with two parallel lines that are connected with a small curved line on one side.
From three corners draw parallel lines out and connect them at the top mirroring the bottom part.
This will be the spine and cover of your book.
Finally, it's time for details – decorate your spine and cover, add lines to stand for your book's pages.
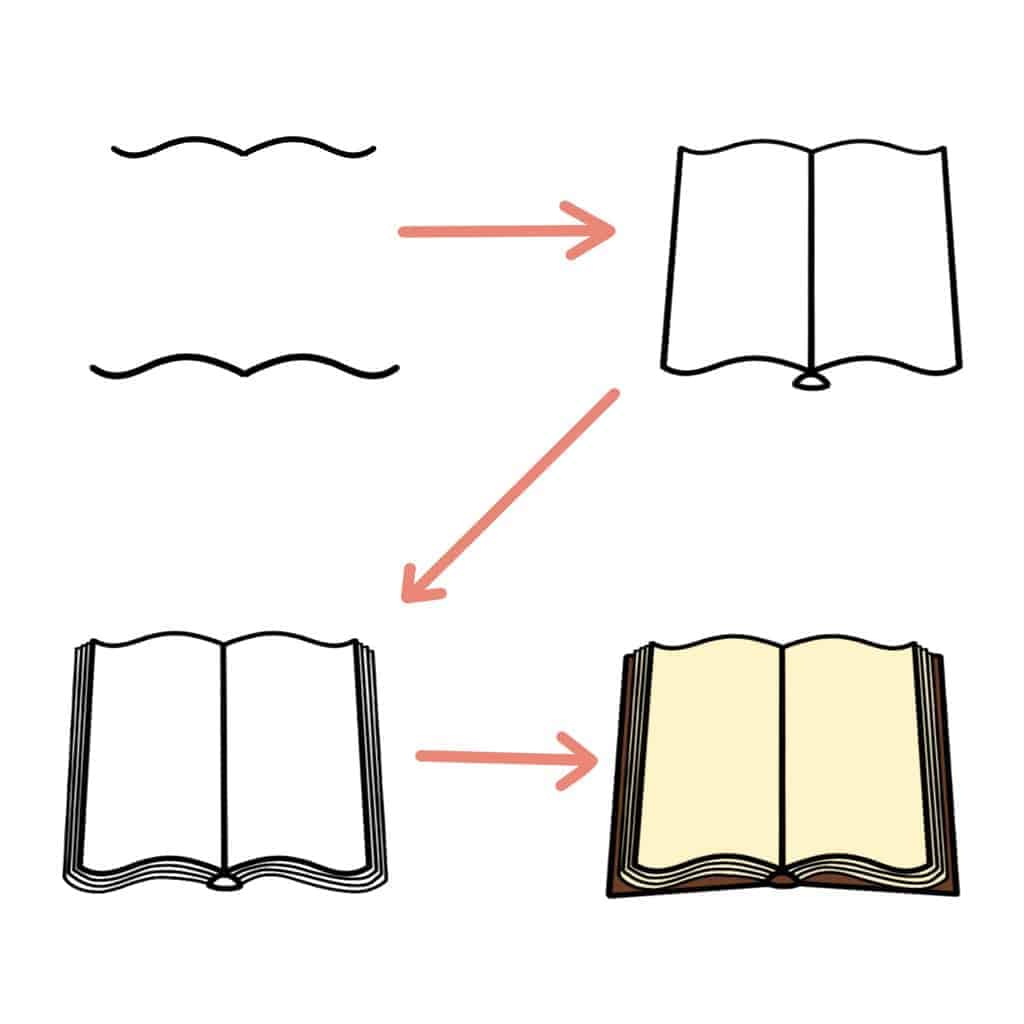
How To Draw An Open Book
Create two mirrored curved lines coming from the same spot. Below them in some distance repeat the same lines but this time make them a bit wider.
This is the open part of your book, so connect the side corners and the middle between the two lines. Be sure to add a little triangle for your spine in the middle part at the bottom.
Next, we will be adding more pages – coming from the spine at the bottom follow the lines of the page but draw new ones just a tiny bit apart from it.
The final step is drawing the cover. Just like with the pages follow the lines, but this time draw straight lines, don't follow the curve.
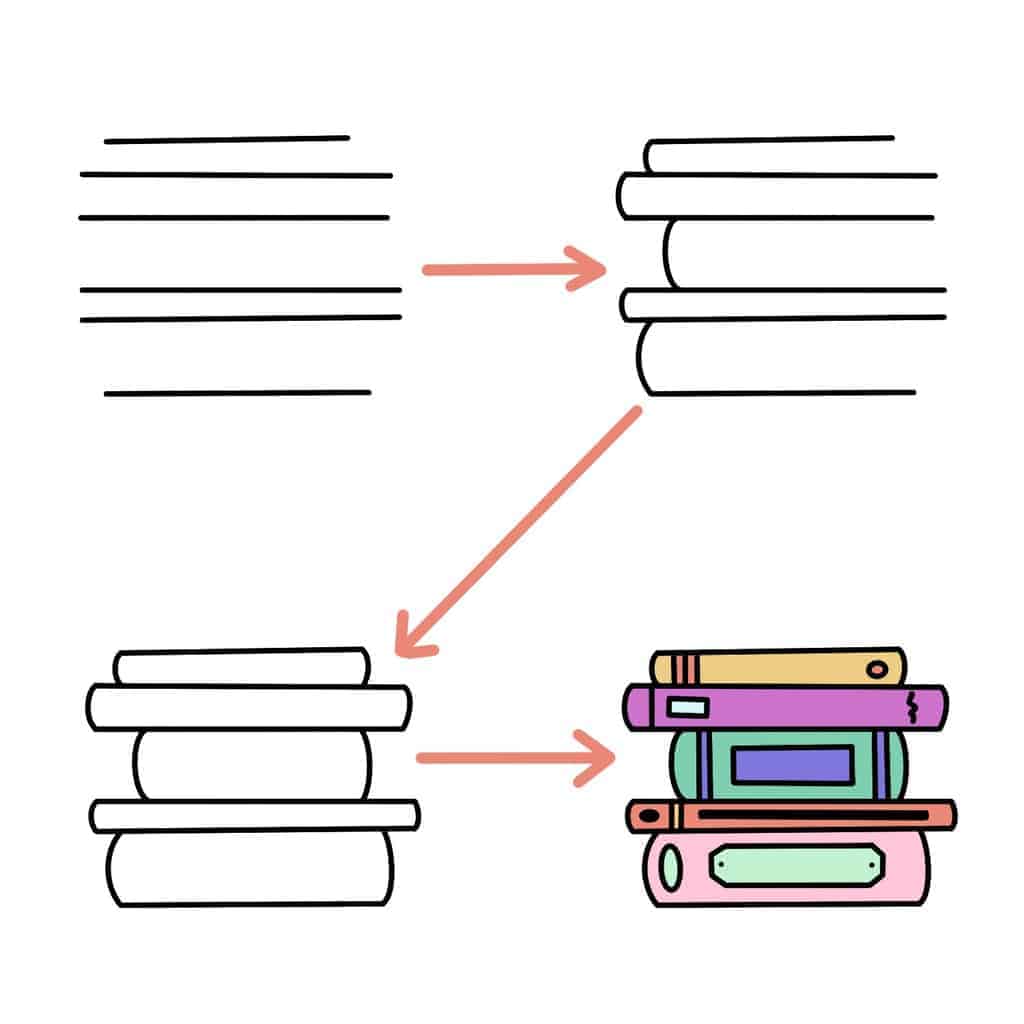
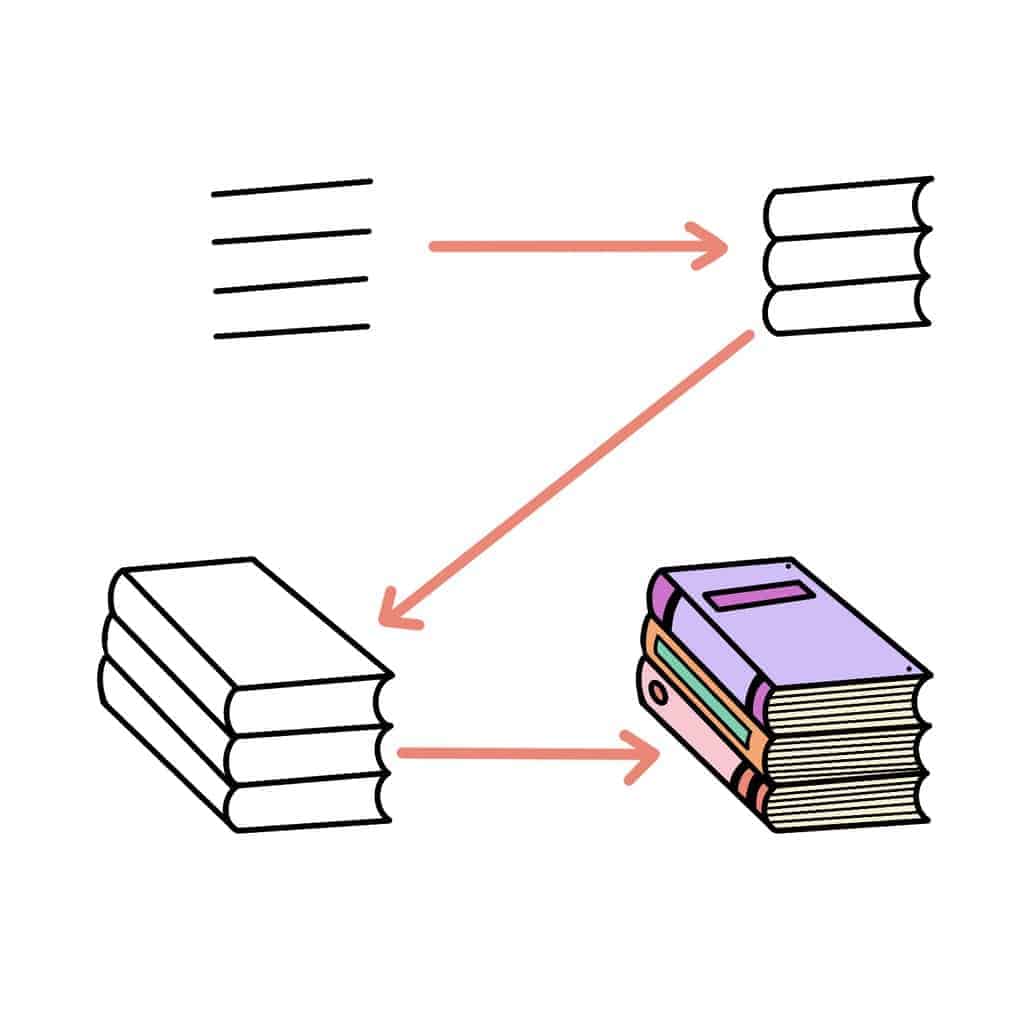
How To Draw A Stack Of Books
This is another super-easy way to draw a stack of books that will definitely add some more variety to your book tracker.
This one is very similar to drawing books standing up, so you should crack it in no time.
Start from creating horizontal parallel lines, remember to have different spaces between the lines and draw the lines in different widths.
Next – connect them with little curved lines. Tadam – these are your book spines!
The final step is to add some decoration to your spines to make them look different. I also like to play around with color.
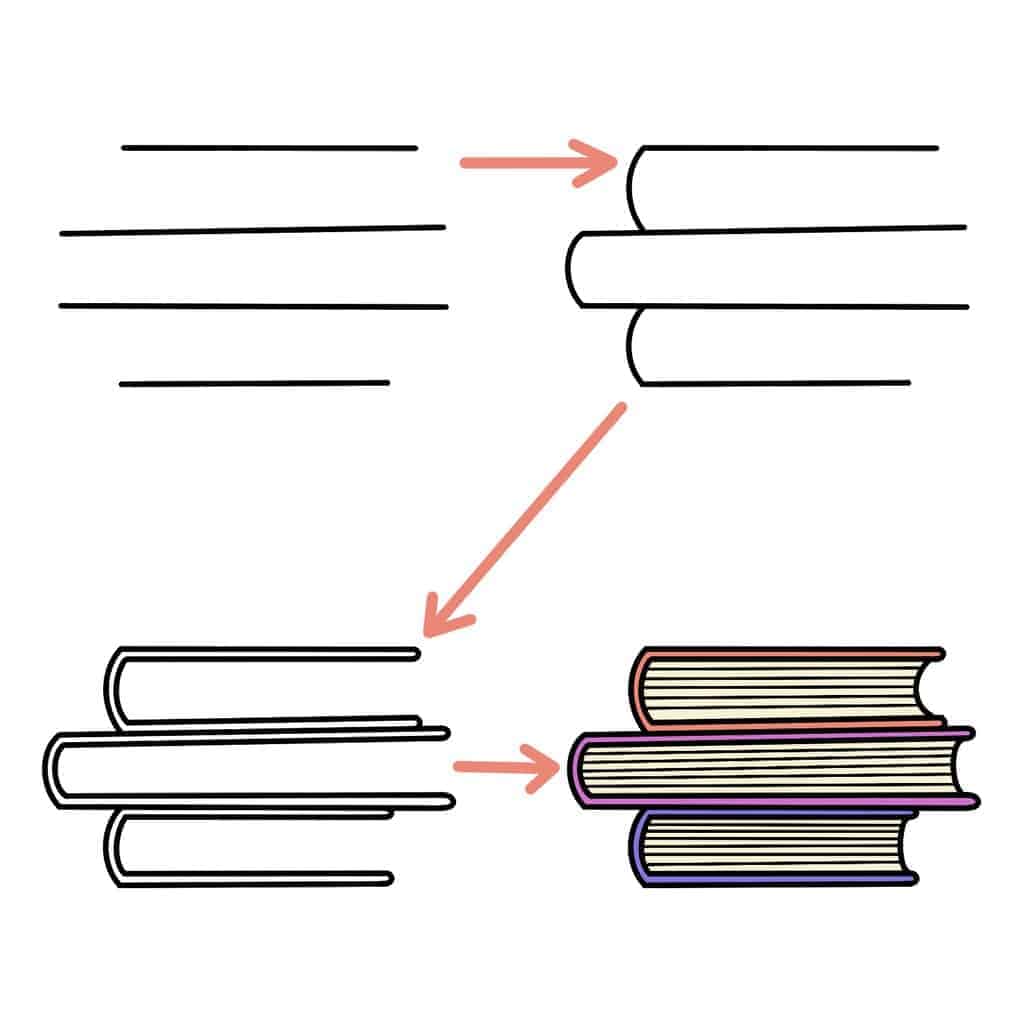
How To Draw A Stack of Books (bottom view)
Another way to draw a stack of books is by looking at it from the bottom.
Just like before, start from parallel lines of different widths. Then connect only one side with curved lines,
Next step – add some width to the book cover but drawing the same lines but inside of each container.
The final step is to draw some lines as your book pages. You can keep them as if you can add curved inside lines to the open side of the books.
How To Draw A Stack Of Books (angled)
This is probably the most difficult of these easy doodles so I left it for the end when you already know all the techniques to use.
Once you decide how many books you want in your stack – draw that many elongated Us. Add a curved inside like on the open part of your Us.
Next time to draw spines and the cover. Draw parallel lines coming from the curves of the Us and one from the top. These are your spines and the cover.
Connect your spines with small curved lines and add a straight line to close your book cover.
The final step is decorating spines, covers, and adding lines for book pages.
You see, these all were pretty easy to draw. Which one of these was your favorite? Let us know in the comments!
Before we finish the post, I just wanted to point you to another place where you can learn doodling – my Patreon. For just $1 a month you'll be getting a new doodle tutorial every other week with three doodles in each.
It's also a great way to support Masha Plans and to get tons of cool stuff for your Bullet Journal, including printable weekly spreads, stickers, monthly setups, and more!
Come take a look at what we have in our Patreon family and I'd be happy to see you join.
Hope this post was interesting if you find it so, please share! If you enjoy my content and want to show your appreciation, please consider supporting me with acup of coffee.
And remember: Keep Bullet Journaling and Don't Be A Blob.
Source: https://mashaplans.com/how-to-draw-a-book/
0 Response to "Easy to Draw Books Stacked"
Post a Comment